

Last updated on 29 August 2022
Image optimization is one of the most important parts of SEO, along with setting up Google Analytics and finding proper keywords because you need your website to load as fast as possible. If you have an online store, then you probably need to add a lot of images of products, and if they don’t have the appropriate dimensions, your website will become very slow, decreasing the user satisfaction. So now, it’s time to tell you exactly how you can optimize your images for Shopify, in order to keep your rankings up.
Method 1 – Use Photoshop
Photoshop is without a doubt the best photo editing software out there, and you can easily export your pictures in any dimensions with it.
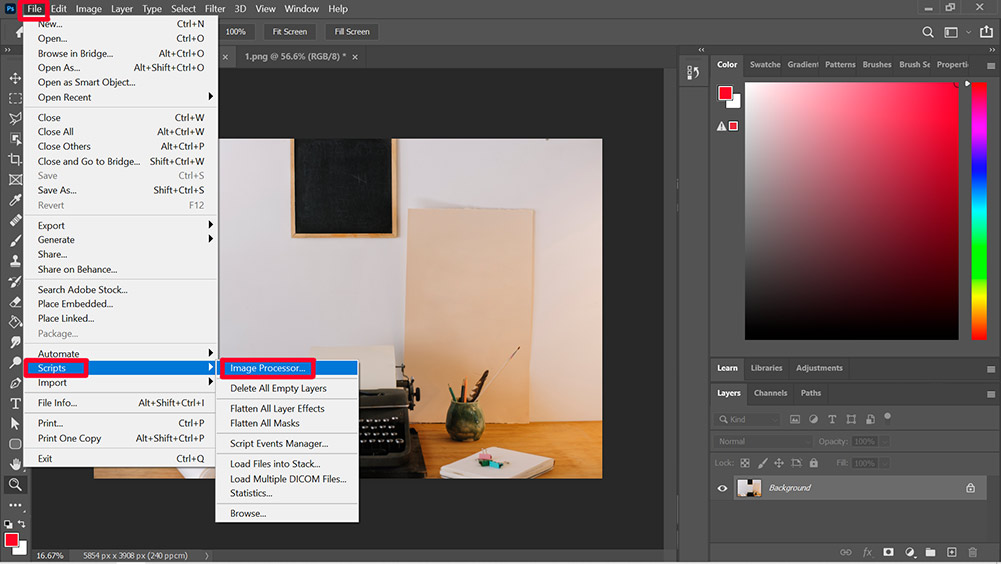
1. Open Photoshop and Select “Image Processor”
Simply go to “Files”, “Scrips” and then click on “Image Processor.” This will open a prompt allowing you to select your files and preferences.
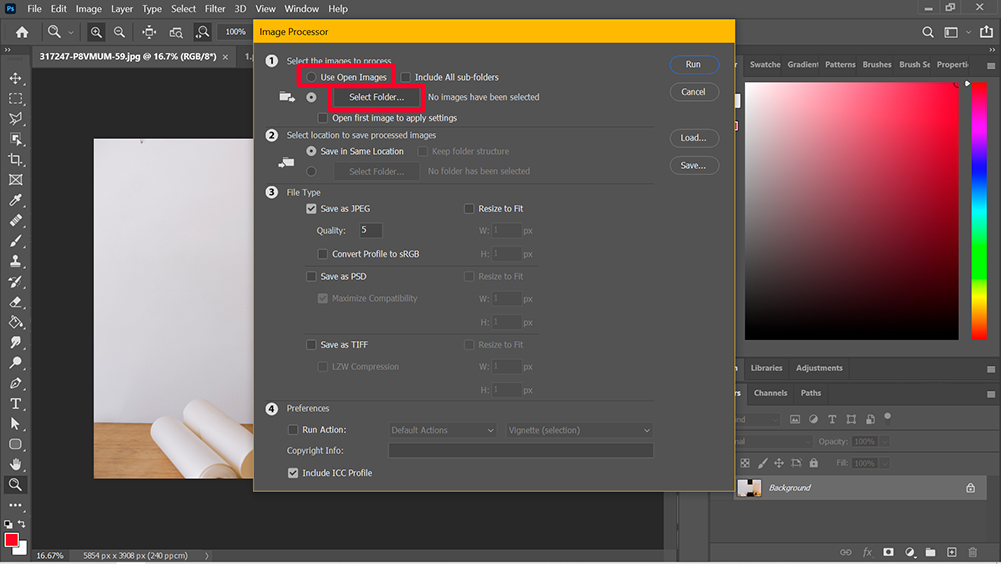
2. Select Your Files
In this screen, you will be able to select if you want to open the images you have already opened, or if you want to select them from a folder on your computer. If you have a large batch of images you need optimized, then you can safely go ahead and select the whole folder.
3. Select Your Preferences
In order to export a picture with a good quality, you should set the “Quality” to 4. Check the “Resize to fit” box and enter your dimensions. The most common ones are 1920×1080. In the Shopify blogs, for example, if your featured images have different sizes, you won’t manage to keep your blog’s appearance consistent.
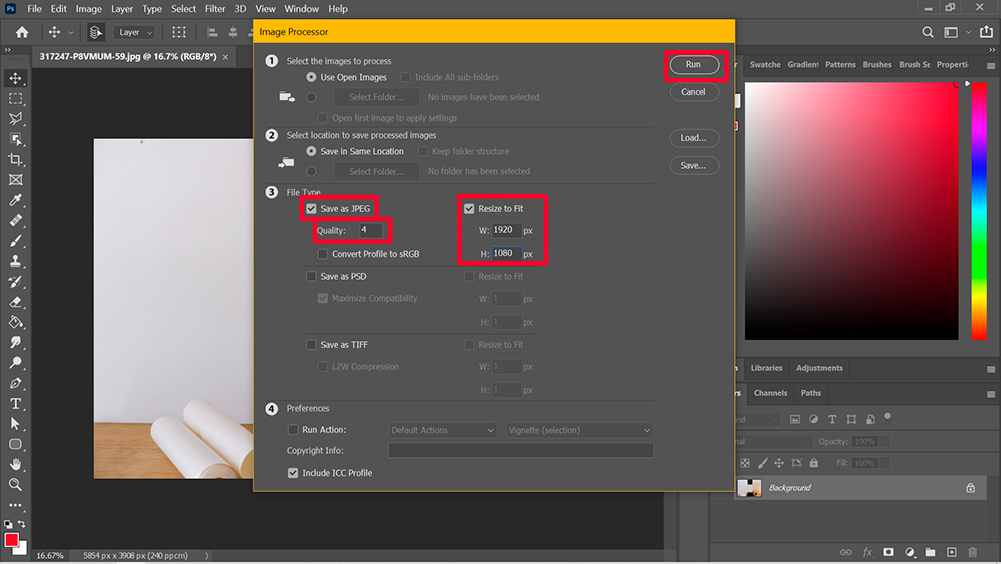
After you set everything up, it’s time to press “Run” and let Photoshop do its job.
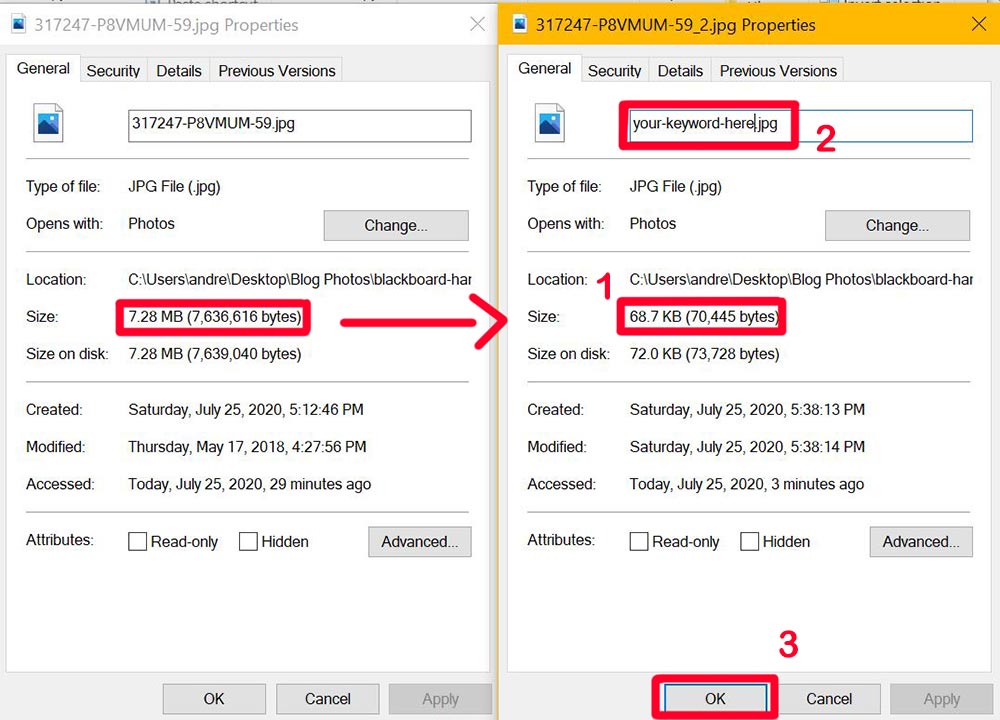
4. Verify The Image And Change Its Name
By simply clicking on “Properties” on your new export, you will be able to see if the image now has a good size. In general, your image should stay under 100KB, the ideal being around 70KB. In the same step, remember to change the file name, and add your keyword. It can be the product’s name, or your blog key phrase.
Because Google also crawls images, it will give you an advantage. Just click “Ok” now, and you’re ready to upload!
Method 2 – Use A Shopify App
As you probably know, Shopify has a lot of apps you can install for your online store. One of them is this SEO Image Optimizer & Resizer. It allows you to compress your images to the perfect size directly from your store.
It comes with a free plan where you can optimize up to 10 images, and then you’ll have to choose a package that suits your needs.
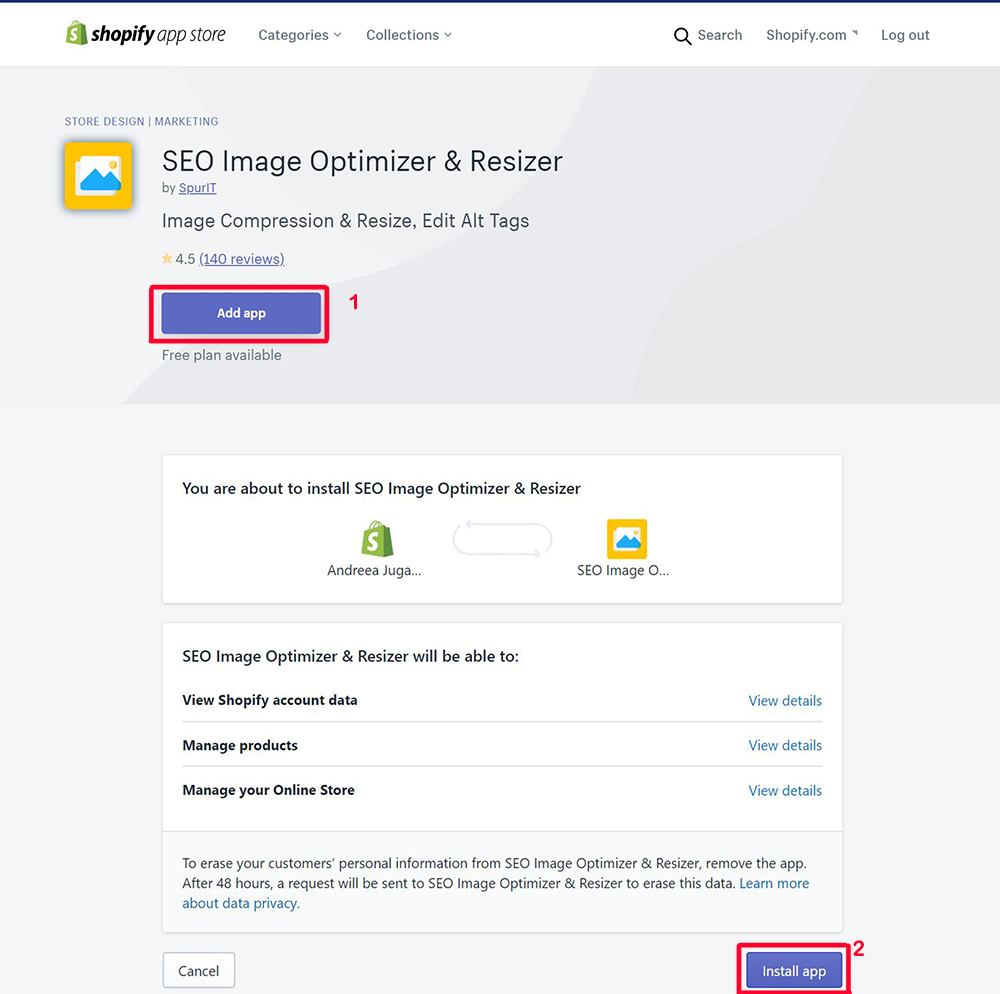
1. Install the Seo Image Optimizer & Resizer
This process is very straightforward. You need to go in your Shopify Dashboard, go to “Apps,” “Visit the Shopify App Store” and search for it or follow the link above. Then, simply install the app to your store. You will automatically start using it on a free plan.
2. Open The App And Resize Your Images
You can configure your app to automatically set alt tags depending on the name of your products, file names and the name of your shop, you can set automatic alt tag updating and compress the images you already have on your website.
Method 3 – Use An Online Alternative
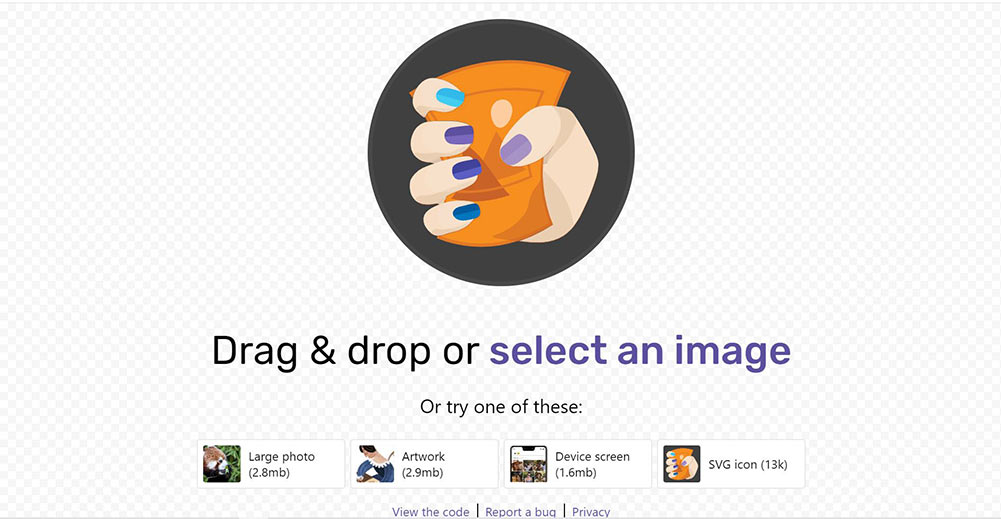
An online app you can use in order to resize and compress your images is Swoosh. Being an online app, it’s very easy to use and you can upload any image.
1. Upload Your Image
In order to optimize your images for Shopify using Swoosh, you need to first upload your image. Either drag and drop your photo or select it from your computer. For this tutorial, I’ll use one of their photo suggestions.
2. Edit Your Photo
Your photo will load, and you can change all the settings. In the bottom left corner you can choose the type of image you want to edit and it’s best if it stays set on “Original image.”
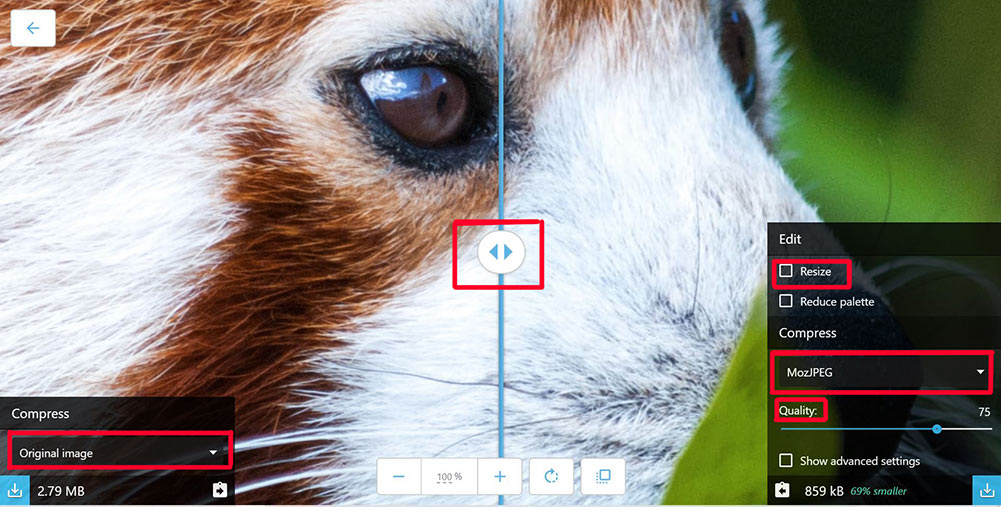
Clicking on “Resize” will allow you to choose the dimensions you need for your photo, and then you can go ahead and choose the way you want to compress it and the quality. In the bottom right corner, you can see the size of the file if you export it with the current settings and the compression percentage.
Additionally, you can use the slider in the middle of the screen to check the quality before and after the edit.
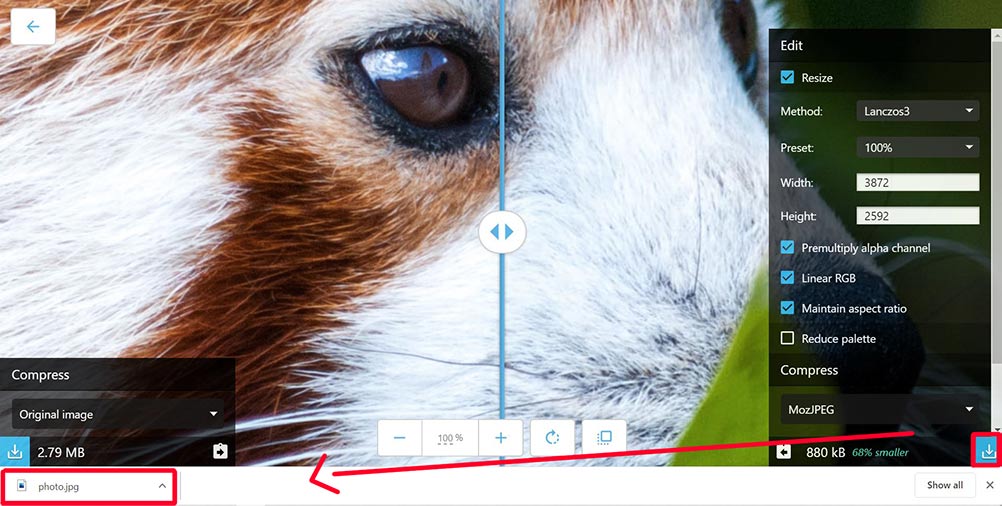
3. Download Your Photo
Simply click on the download button in the bottom right corner, and your photo will start downloading. After that, you will want to rename your file in order to match your keyword.
It’s very important that all the images on your online store are perfectly optimized. Besides having your website load faster, the search engines will have an easier time finding your products and crawling your website. Happily, now you know how to optimize images for Shopify!