

Procreate is considered to be one of the easiest programs for aspiring and professional graphic designers. It has all the tools you need to create impressive artwork and today, we’ll learn how to mirror in Procreate.
Even though it’s an apparent easy process, it can get overwhelming when you have tons of layers you need to work with.
Mirroring in Procreate
In Procreate, mirroring is simply called “flip,” and you have two ways of doing it:
- Vertical Flip
- Horizontal Flip
The vertical flip turns your image upside down, and you can find it in the edit menu in the upper left corner.
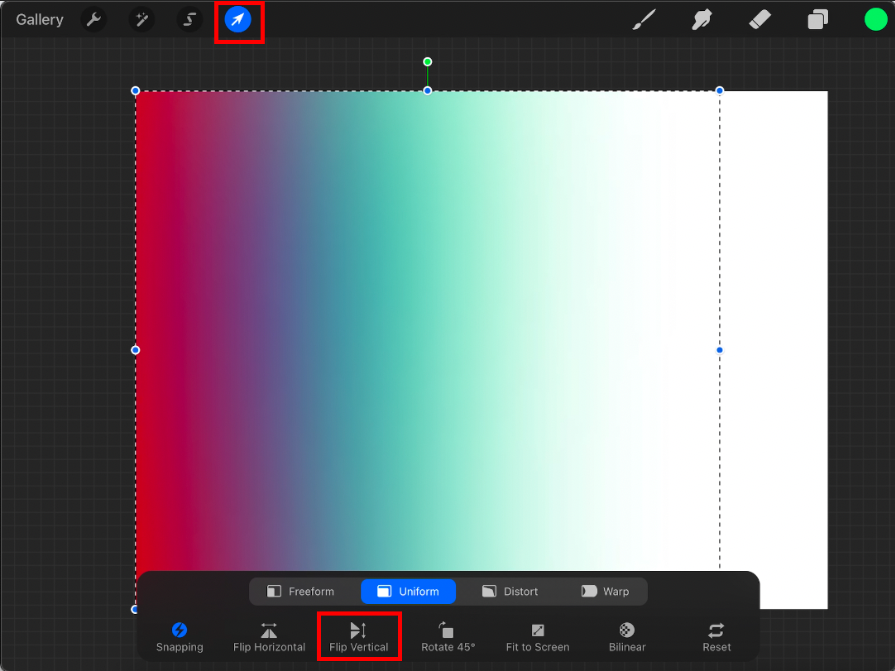
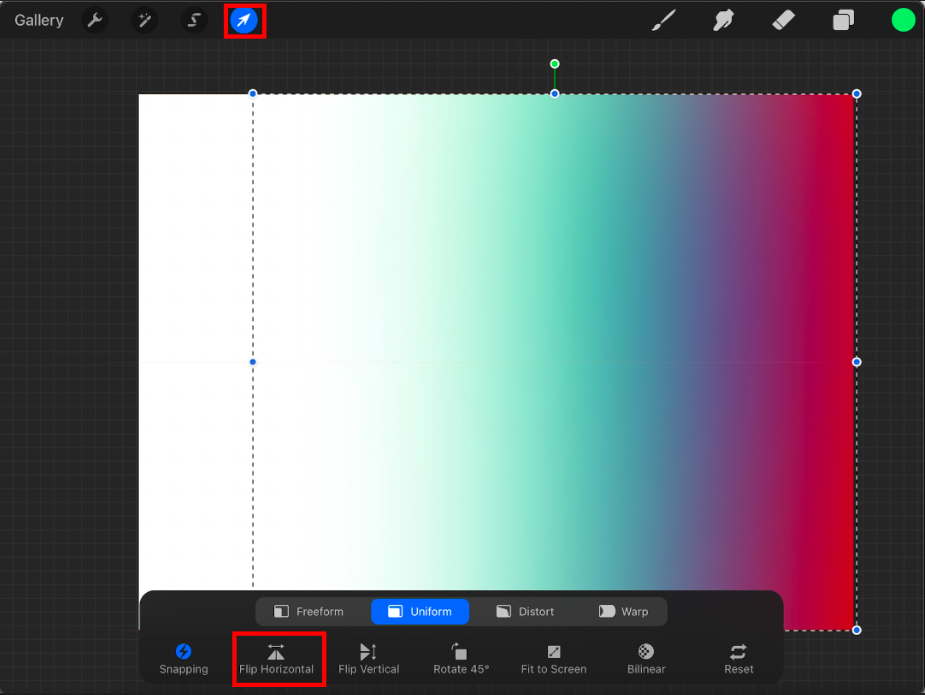
The horizontal flip is the classic mirror effect you may find in any other design software, and it may be the one you’re looking for. It simply mirrors the layer you have selected.
How to Mirror in Procreate Step by Step
- Choose the layer you want to mirror. You can’t mirror the entire project, so you need to pick your layer.
- Go to the editing menu. You can find the pointe in the upper left corner of the screen. There, you can edit everything about the layer. You can change its size, distort, warp, mirror and rotate it.
- Click on “Flip Horizontal” or “Flip Vertical.” Those buttons will flip your image the way you want to.
- Fit your layer. You’re done! If you want to further edit your layer, you can use any of its options. The “Freeform” option will allow you to resize it however you want, while the “Uniform” options will maintain the proportions.
If you want to draw in the mirror, you can use its symmetry tool. You need to click on the wrench menu, then “Canvas” and select “Drawing Guide.” That will add a grid on your screen, which you can edit however you want. From its options, you can select the classic guide, perspective, and symmetry. The symmetry tool is what you may be interested in. You can select how many lines you need. What you need to keep in mind is that this tool will only affect the layer you have selected. If you want to do the same on another layer, you need to create it and open the drawing guide again. This is a little inconvenient at first, but as you start to get used to it, it’s a smooth process.
Procreate is definitely easy to use, but only after you get used to it. It has all the tools you need, so there’s not going to be a problem with creating the best artwork out there. You can also take a look at our guide on how to use Procreate, so you get a headstart and learn where all the tools are and how you can use them to improve your skills!