

Last updated on 5 July 2022
Through nice features and updates, each version of DaVinci Resolve has become more efficient than the precedent one. Blackmagic Design made a difference in Resolve 15 with the cool feature called Shared Node. It was such a good update that even today we use a shared node in DaVinci Resolve 17.
800+ DaVinci Resolve Animated Elements
Over 800 unique drag & drop animations that work directly in DaVinci Resolve. Improve your video editing with professional video editing tools. No need to hire animators at a high cost & look more professional.
Provided in Apple ProRes 4444 + Alpha channel, MP4 H264 & PNG Photos.

Get 30% off – $84 $49
What Is a Shared Node?
A Shared Node is a feature in DaVinci Resolve that was introduced by Blackmagic Design in Resolve 15. What is its purpose? It allows the editor to share individual nodes across multiple clips. Thus, color correcting and color grading on all clips while keeping the specific properties from the clip nodes became possible.
Before the Shared Node
Before this update, back in the days, if you needed to change the shot’s color for a specific scene, you had two options: individually open each shot and apply a new node or group all shots together and apply the correction.
If you are thinking, then why shared nodes? Well, with the grouping aspect, you had to keep switching between the video clip node graph and the group node graph to make adjustments. Therefore, applying a color adjustment for multiple shots was tiresome.
Step 1: Creating a Shared Node
Since the Shared Node feature was introduced in DaVinci Resolve, this operation became easier. Creating such a node is easy — you simply right-click any corrector node and select “Save as Shared Node.”
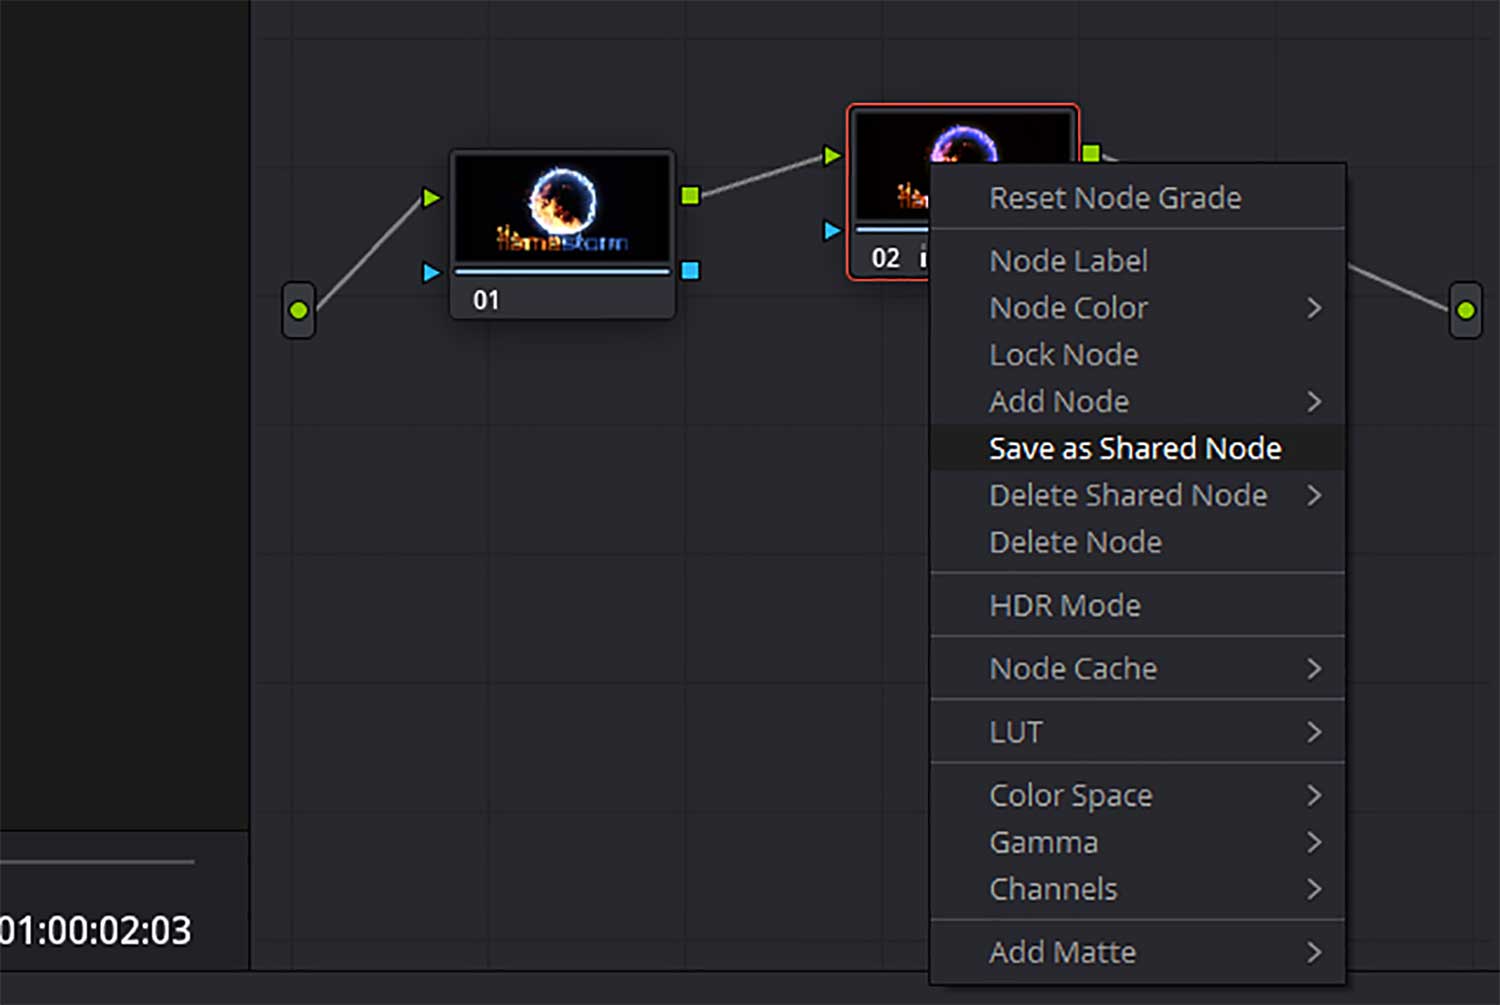
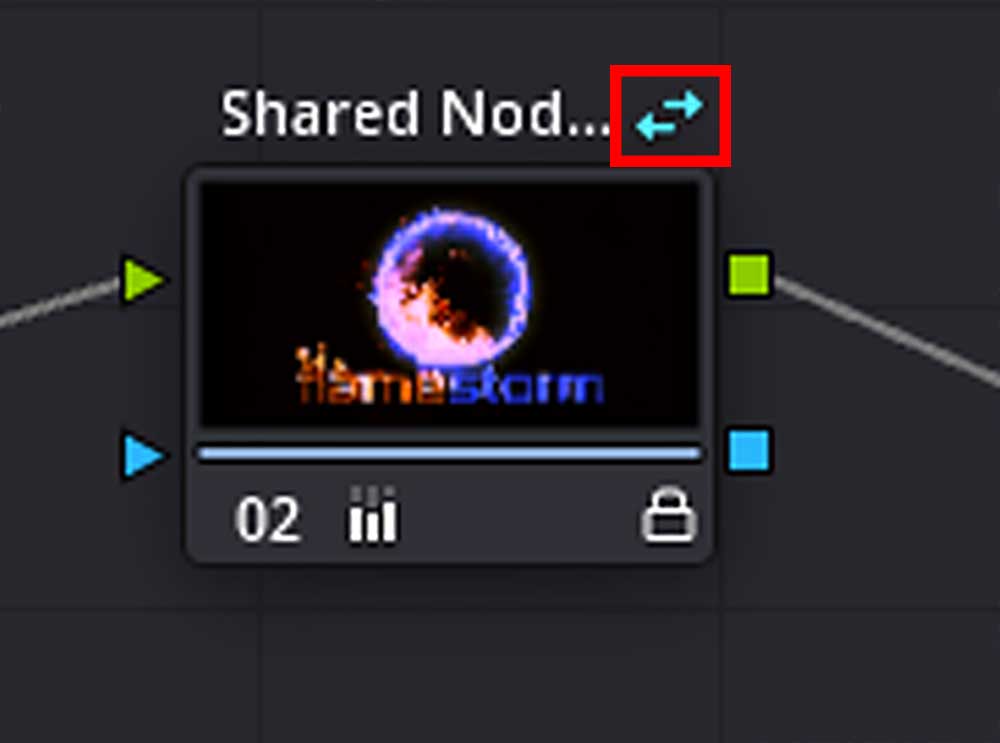
There will be no color change to the outline or something like that, but a hard-to-miss icon will let you know that the node is a shared one.
Step 2: How to Use the Shared Node
Okay, you created a shared node, how to use it? Well, just like a regular node, you can copy and paste it to another shot. As you make adjustments to one Shared Node, it will ripple across all of the other Shared Nodes of the same name.
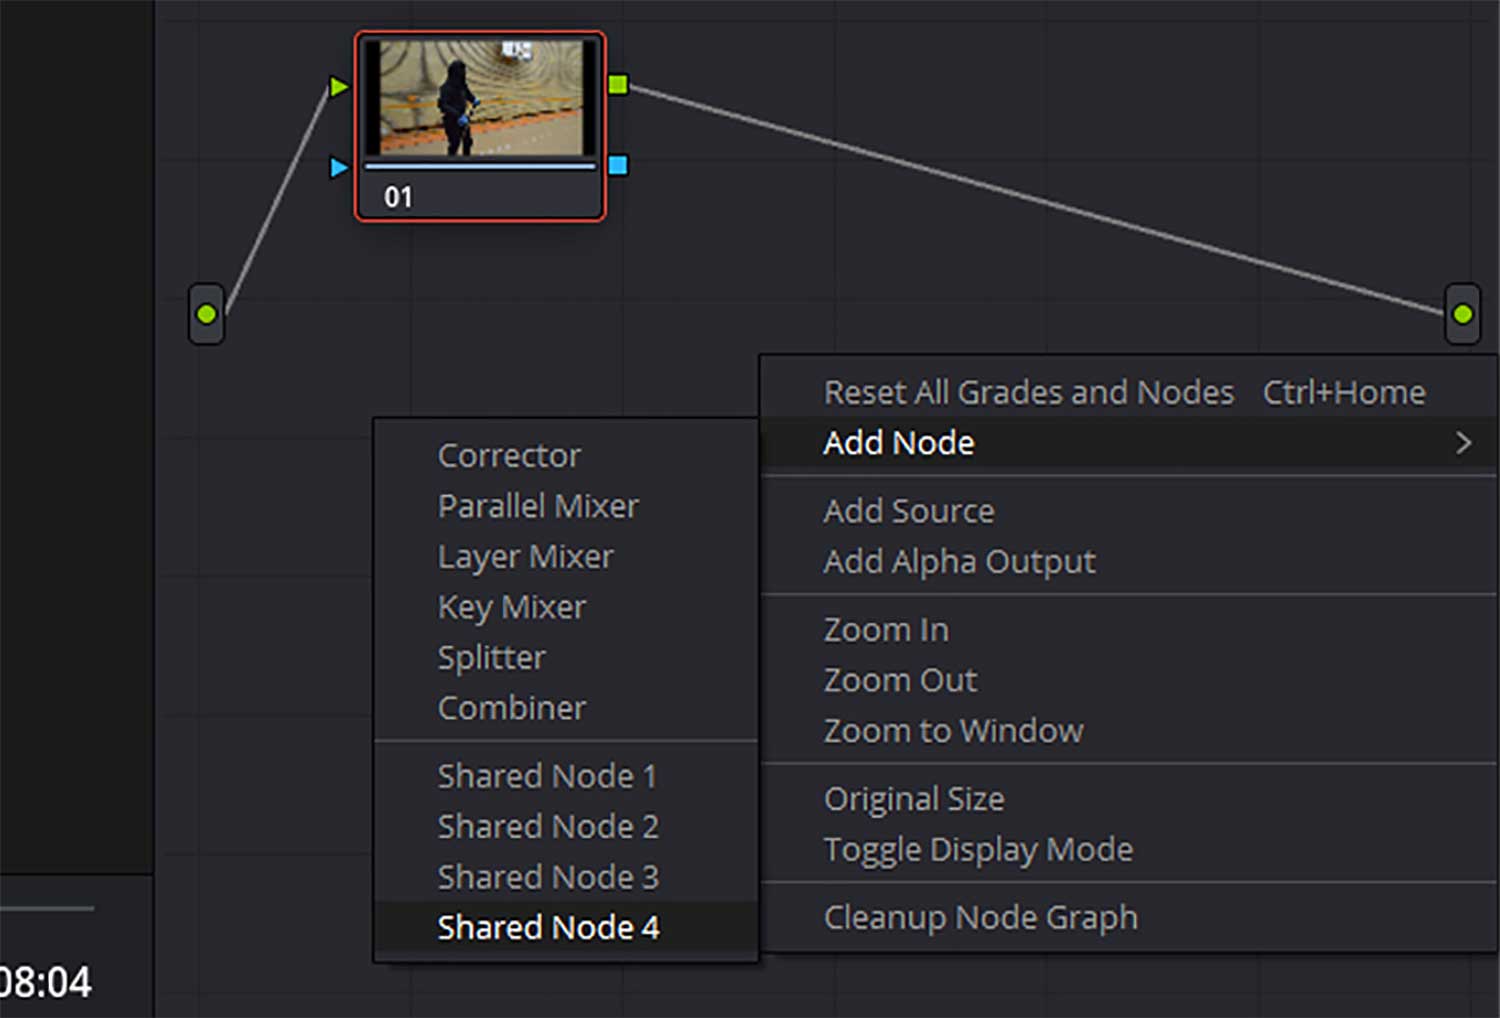
Another way to use them is to add them in the graph editor as a separate corrector node and link them to the other nodes. The really neat part is that it lives as a regular clip node.
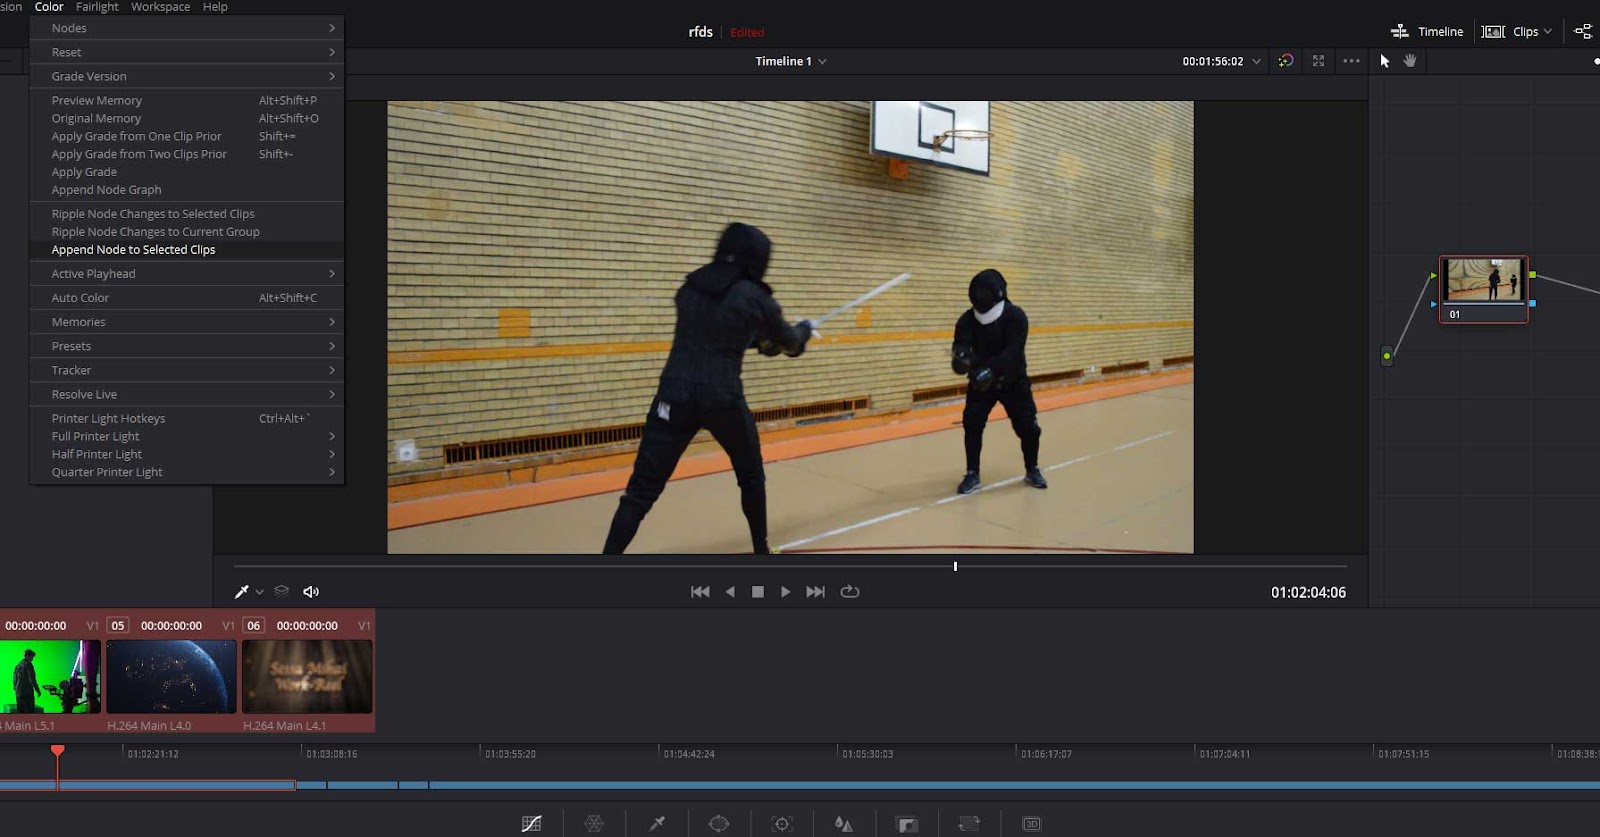
If you have lots of clips that you need to apply the shared node to all, you can do this with relatively few clicks. First, make sure that the shared node is selected in the open clip window and that the clip timeline is visible. Then, while holding Ctrl, select the clips, open the color menu, and click “Append Node To Selected Clips.”
Uses for Shared Nodes
While using the Shared Node method, you can make new nodes on a clip, change things like adding contrast or fixing highlights, and all of those changes will be unique to that shot while still incorporating the Shared Node corrections.
One of the beautiful aspects of working this way is that you can make a custom Shared Node in DaVinci Resolve for different environments. You can make one for each moment of the day, temperature, or weather and easily add it to each clip while still keeping the ability to make adjustments.
As there are many different ways of achieving the same thing inside DaVinci Resolve 17, you can choose to work with this method or with the grouping method. There sure is no correct way of doing things here, stick with what works for you and keep making wonderful things!