

Last updated on 5 July 2022
Like any other post-production software out there, After Effects can support a lot of file formats and codecs. Nevertheless, it can also render out your project in many types of file formats, each of them meant for a different purpose. If you plan to start learning how to use this software, how to render/export in After Effects is one of the things you must know.
Two Ways to Render/Export in After Effects
After long hours of work you want to lay back and see it rendering, the most basic way of exporting or rendering your project in After Effects is by using its own render engine. Unfortunately, Adobe stopped allowing us to render in small formats such as MP4 from After Effects — I never understood why. But if I were to guess, I would say that there were not as many people using Media Encoder back then as there are today and Adobe wanted to change that.
Media Encoder comes as a bundle together with the installation of After Effects. Media Encoder can be purchased today from Adobe as a monthly subscription together with After Effects, for only $20.99 per month.
This takes us to the second method of render/export in After Effects. You can bridge your project directly inside Media Encoder and here you will be able to select many other types of file formats, including MP4 or H.264.
To export a video in After Effects is really easy. Just go to “Composition” at the top of the program, click on “Add to Adobe Media Encoder Queue“. Enter your desired render settings, then click “Export“!
Method 1 – Internal Render in After Effects
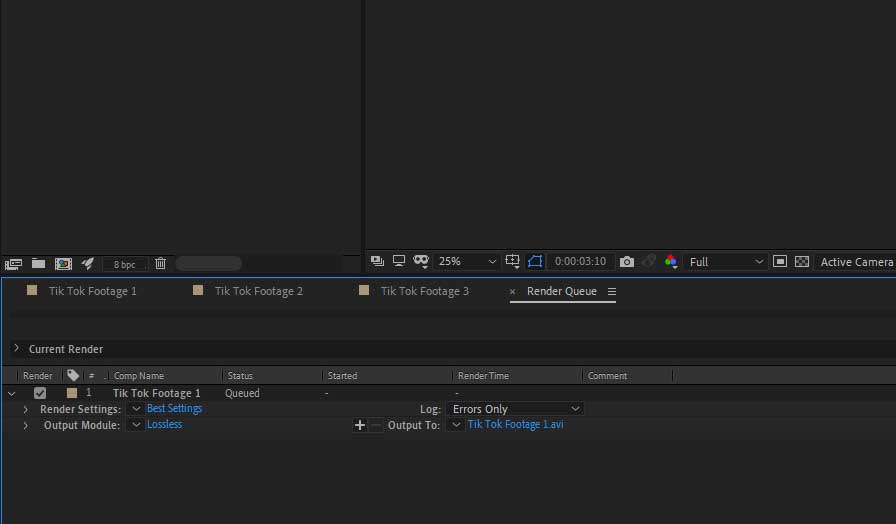
1. Add to the render queue in After Effects
When you want to export your project from After Effects, you simply go to the Composition drop-down menu from the top left corner of the window and select “Add to Render Queue”.
This will open up the Render Queue tab in which the composition will be loaded as a task.

This way can add lots of compositions to a queue to be rendered.
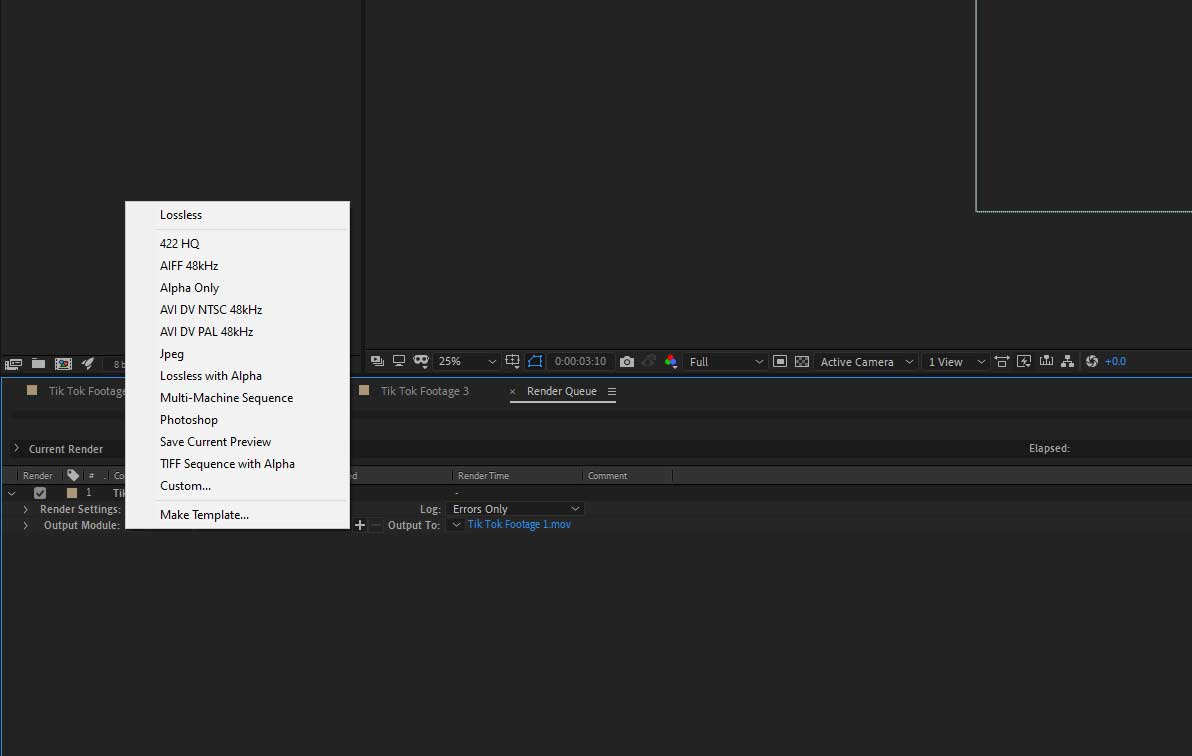
2. Click the blue “Lossless” button
What is left to do is simply choose a file format, a destination and a name for the video. To choose a file format you have to press on the blue “Lossless” text. A new window will appear which will contain technical specifications and formats you can choose from. Select what you need and press “Ok”.
3. Choose your format

If you plan to do the same type of render for many compositions you can create a template and access it by pressing on the small arrow pointing down, next to “Output Module”. All the templates you have will appear and if you want to create yours, simply press on “Make Template” and follow the simple steps there.
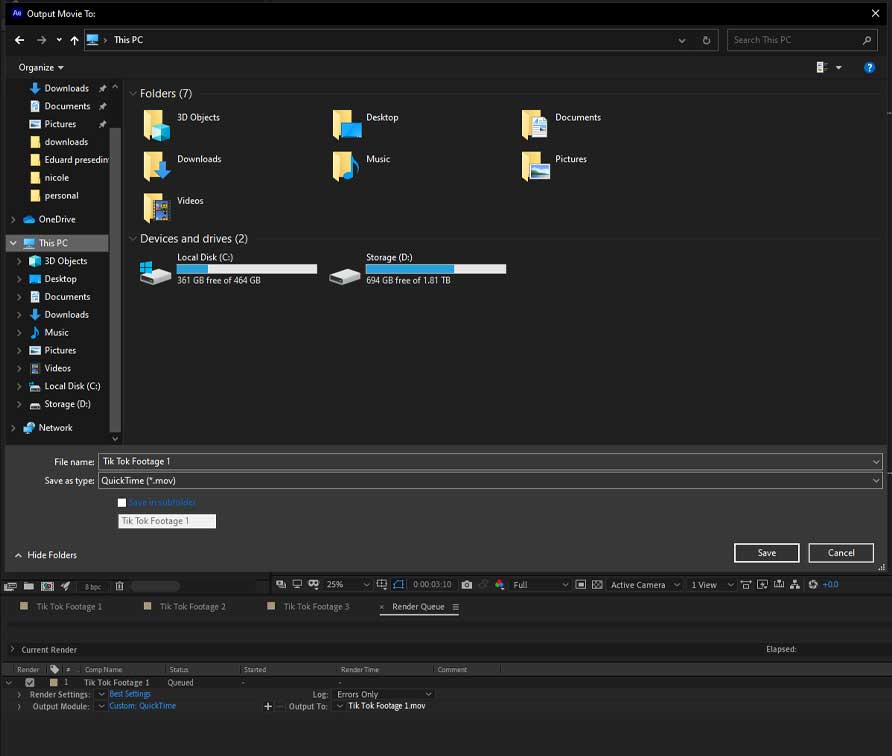
4. Choose a name and destination
What is left to do is simply choose a file destination and a name for your video. You do this by clicking on the blue text next to “Output To”, a new window will pop and you will be able to choose the destination and name of your file.
5. Render
Finally, now you can press the “Render” button. It will be situated on the lower-right side of the window.
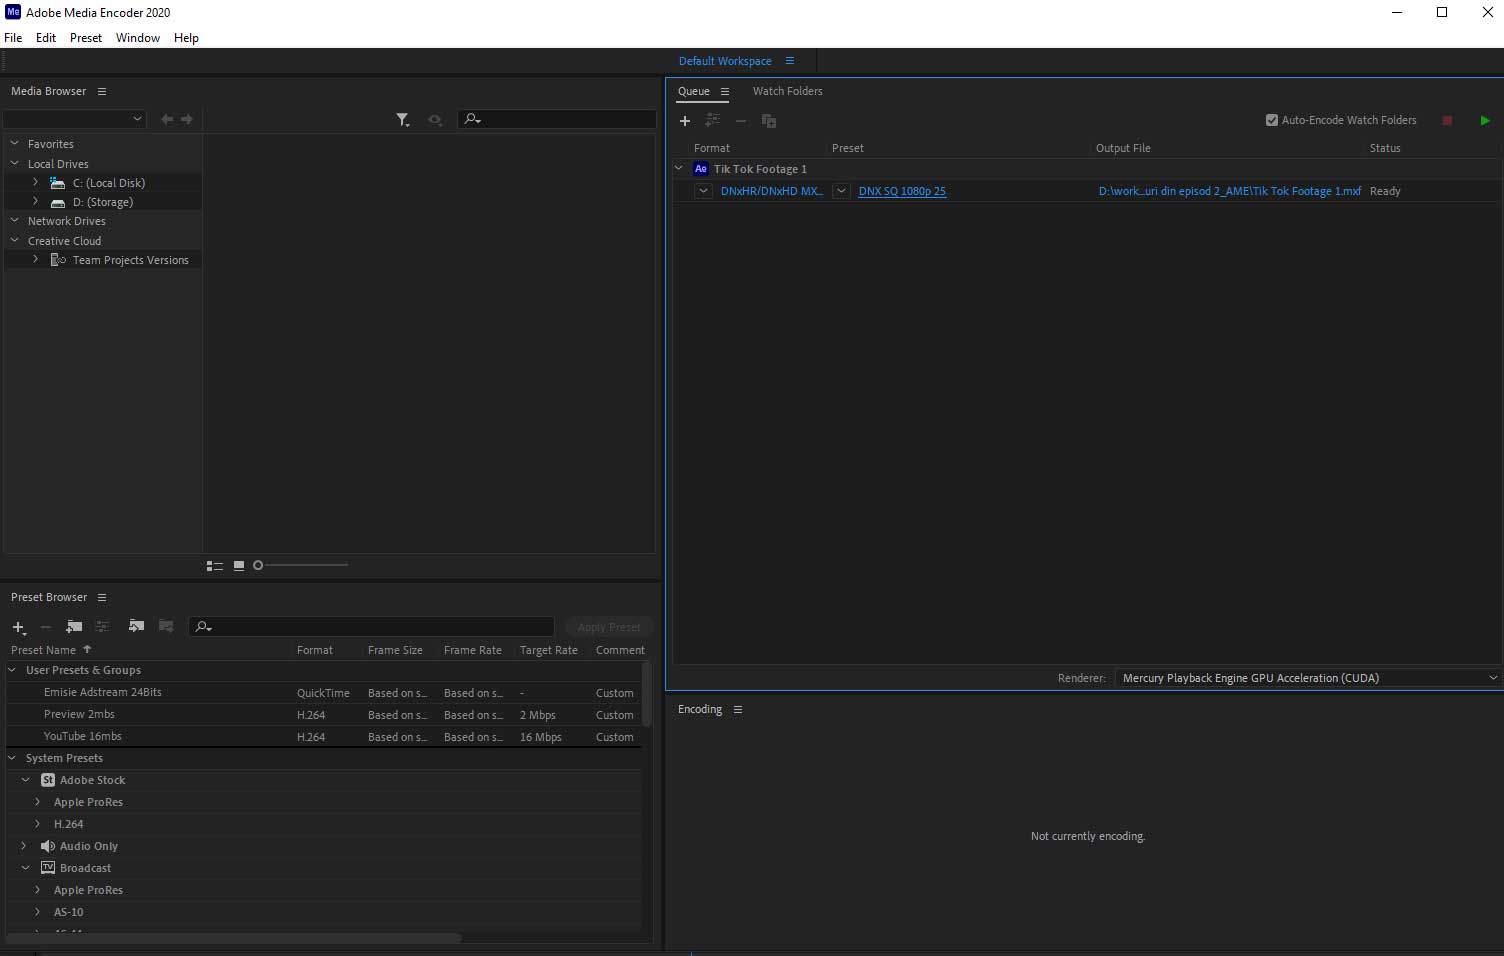
Method 2 – Render using Adobe Media Encoder
1. Add to Adobe Media Encoder Queue
When you want to bridge your project directly inside Media Encoder, you simply go to the Composition drop-down menu from the top left corner of the window and select “Add to Adobe Media Encoder Queue”
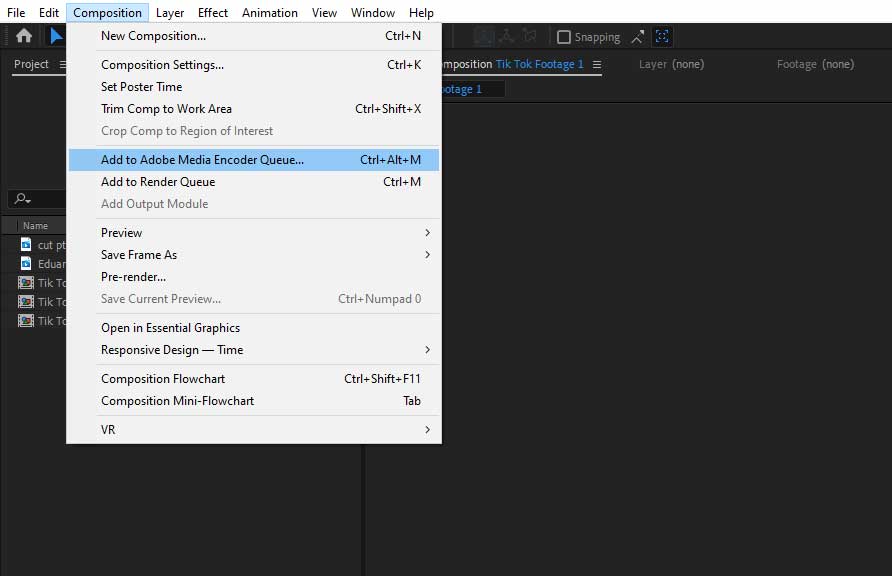
By doing this it will open up Media Encoder and your composition will be loaded inside it.
2. Choose your file format, name & destination
Now just press on the first blue text associated with your composition, this will open up a new window in which you will choose the name, the destination, and one of them any file formats Media Encoder can provide, even MP4.
3. Edit the settings for your video
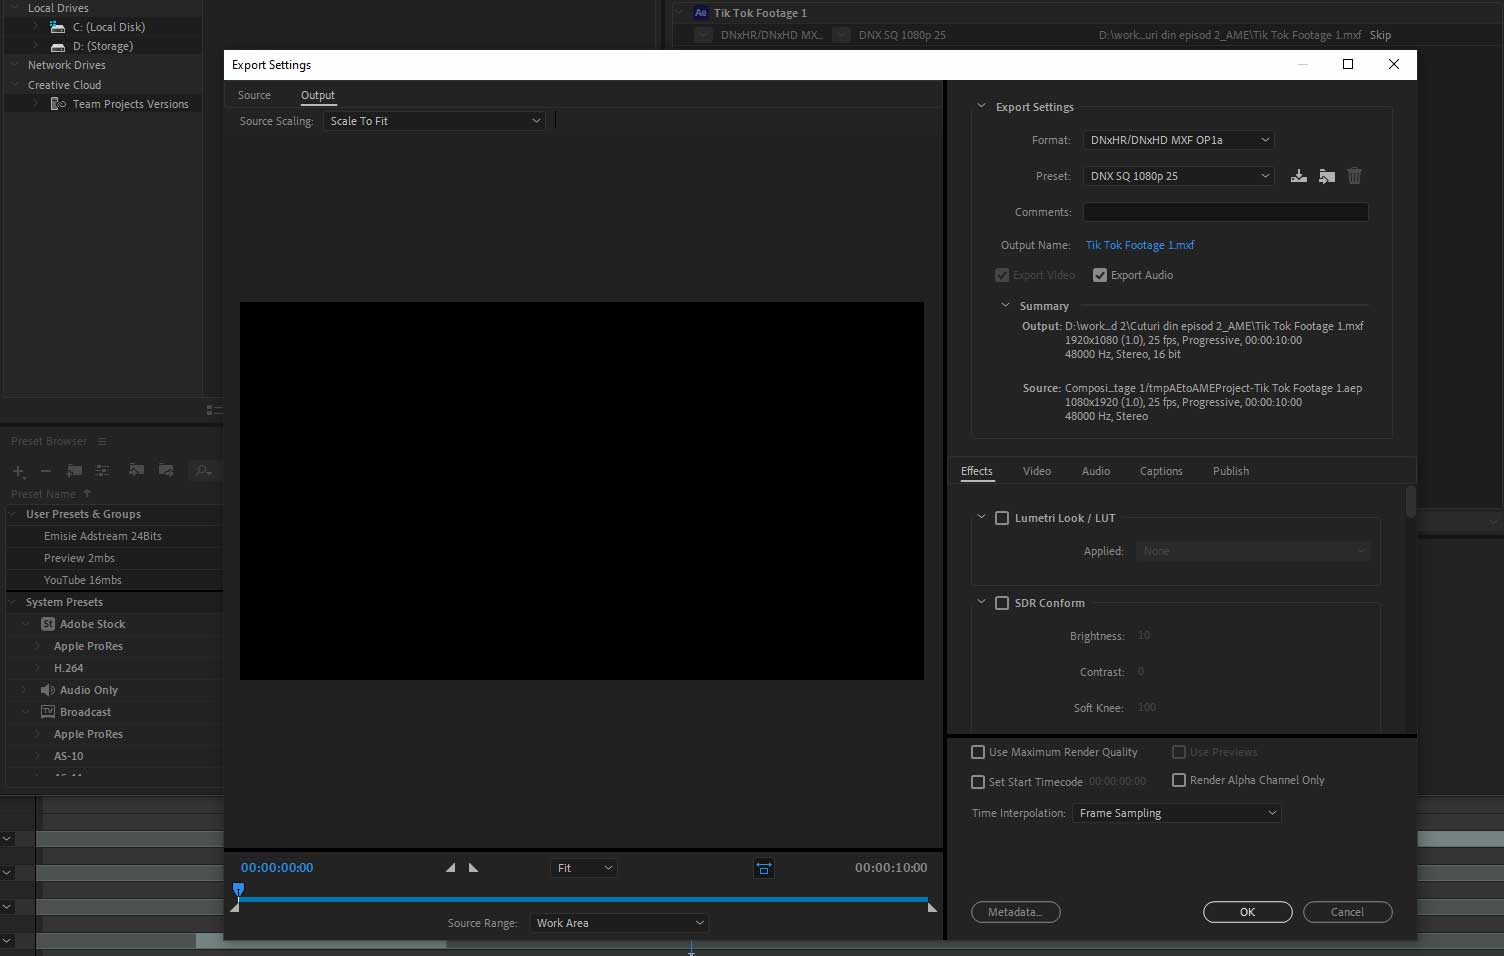
Here you can also save presets like in After Effects and access them to speed up your work. After you’ve done everything press “Ok”.
4. Render
Go to the top right corner of the window and press the green triangle to start the render.
As a video editor, I worked a lot with these two programs and I recommend using the first method for your main render in After Effects. Then encode an MP4 for preview by loading those big format renders directly into Media Encoder. I say this because the connectivity between the two programs is not that fast from my point of view. This can become annoying when you have to do lots of renders. Try for yourself and see what works best for you!