

Last updated on 15 May 2022
If you just bought Procreate and you’re wondering how to animate in Procreate, then this is where you should be. Even though the process is technically simple, there are a few steps you need to go through to fully understand the process.
If you; ‘re interested, please see our complete guide for Procreate.
There are 3 main rules you need to know before you start, but first, let’s take a look at the process.
How to Animate in Procreate Step by Step
1. Activate the “Animation Assist” feature
To access the animation assistant, you must go to the top left corner, click on the wrench menu and go to “Canvas”.

2. Draw something & add a new layer
In Procreate, every visible layer is considered to be a new frame in your animation. This means that you can’t keep your elements on multiple layers — you need to merge the layers containing all the elements.
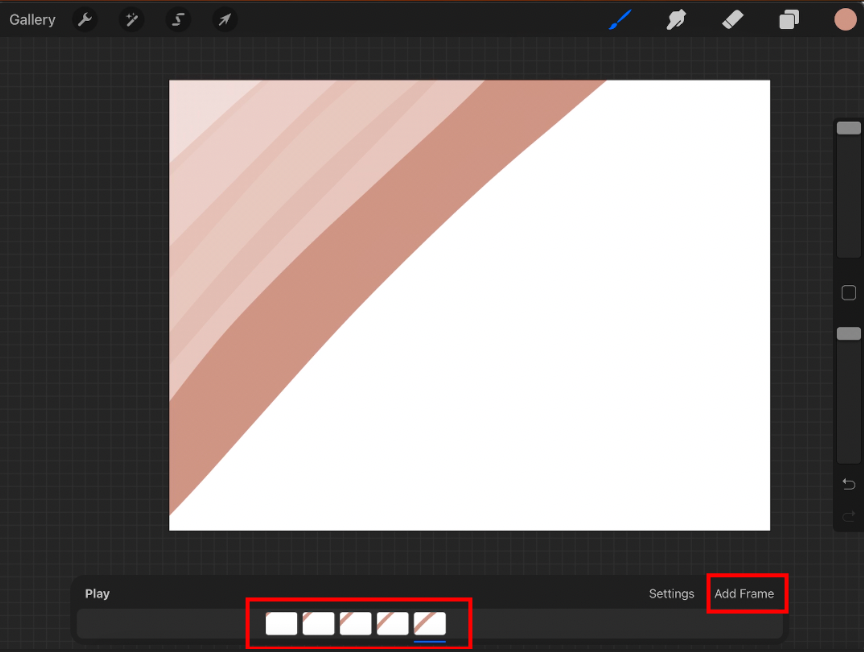
3. Press “Play”
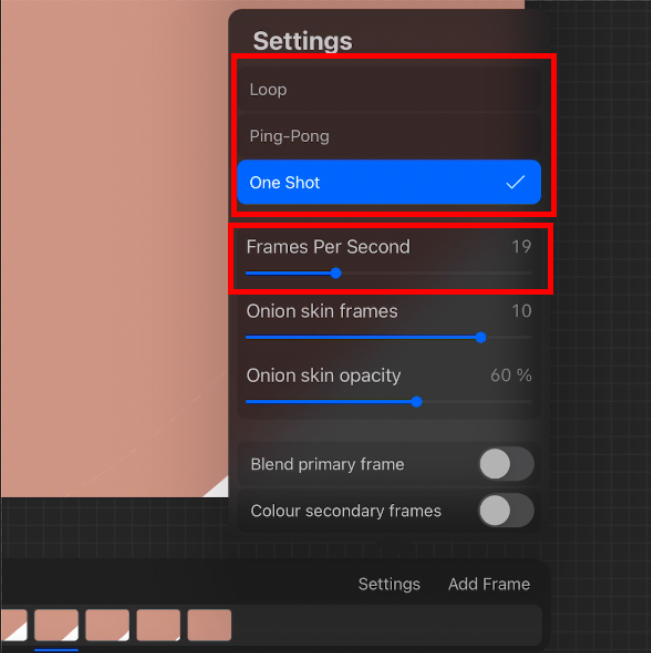
After you’re done with your layers, you can press “Play” to see how it looks. If you want to further adjust it, you can change the number of frames and animation type. Procreate allows you to select up to 60 fps, and has 3 playback types:
- Loop — as the name suggests, the loop animation will play your video from the beginning forever — or until you stop it. It just goes forward.
- Ping-pong — this type of animation will play your video from beginning to end and backwards until you stop it.
- One-shot — this is the most basic style, and will only play your video from start to end, one time.
What you need to know about Procreate animations
1. Every layer is a new frame
In Procreate, every new layer is a new frame. If you create a complex animation, you need to edit it as you go. You can either create all your layers and then merge them when you animate, or simply add the animated elements one by one.
2. You can choose the main background frame
Unlike all the layers that change when you edit, the background frame never changes. This is great if you want to create lo-fi animations where you have the main image, and then add a couple of animated elements.
3. When you create a new layer, it’s empty
If you want to make a continuous animation, you need to duplicate the layer you worked on. Otherwise, you need to create the entire image again and again. Depending on the type of project you want to create, you may want to duplicate an existing layer or create a new one. In general, the layer you duplicate is the background, as you need to add more and more images to it.
4. You can change the Onion Skin settings
The onion skins are the shadows you see on a new layer you add to your animation. Depending on the complexity of your projects, you may need more or less onion skin frames, with different opacities.
All you need to do now to improve your skills in Procreate is to learn how to animate on your own. Start by following the simple instructions in this guide, and create something awesome!