

Removing the background from a photo is a hell of a job. Er… used to be a hell of a job, for which you needed several tools and a lot of experience. But not anymore!
Canva makes it easy for you with the new Pro option ‘Background remover‘. An invention in this heyday of visual content! Note that this feature can only be used if you have a Pro subscription for Canva.
Should you click away if you do not have Canva Pro? No, not at all, because there are some great photo effects added, and they are totally free! It is so fun, and on top of that, we will make it a lot easier.
Read in this article how to remove a background from a photo and what other options Canva now offers to make your photos stand out from the crowd.
What is Canva, again?
Canva is a tool that allows every VA, freelancer, webshop owner and other entrepreneurs to easily design social media posts, logos, presentations, videos, animated posts and all other visual content. It is so-called design software.
Choose from a huge range of templates that are often created by designers, customise the template, and that’s it!
Very quick and very easy.
In each design, you can use your own photos or choose a photo from Canva’s photo library. Pro users can choose from more than 2 million free images!
Removing the background overview
So in Canva, you have all kinds of options to edit your photos. In this text, I will go through each one and give you an overview of all the options.
Removing the background example
You will need Canva Pro for this one, and it works really well! I am very impressed with the quality. I used to use all kinds of other tools that provided much lower quality.
And if the result is not quite right, you can do the finishing manually. Both polishing and recreating are possible. As said, this is a Canva Pro option. What does it actually mean to remove the background from a photo? Exactly what it says: everything except the main subject is cut away from the photo. In fact, only a part of the image remains. The rest of the image becomes transparent.
This immediately answers the next question: “Why would you want to remove the background of a photo?”
Combining images using background removal
Look at the following two images.

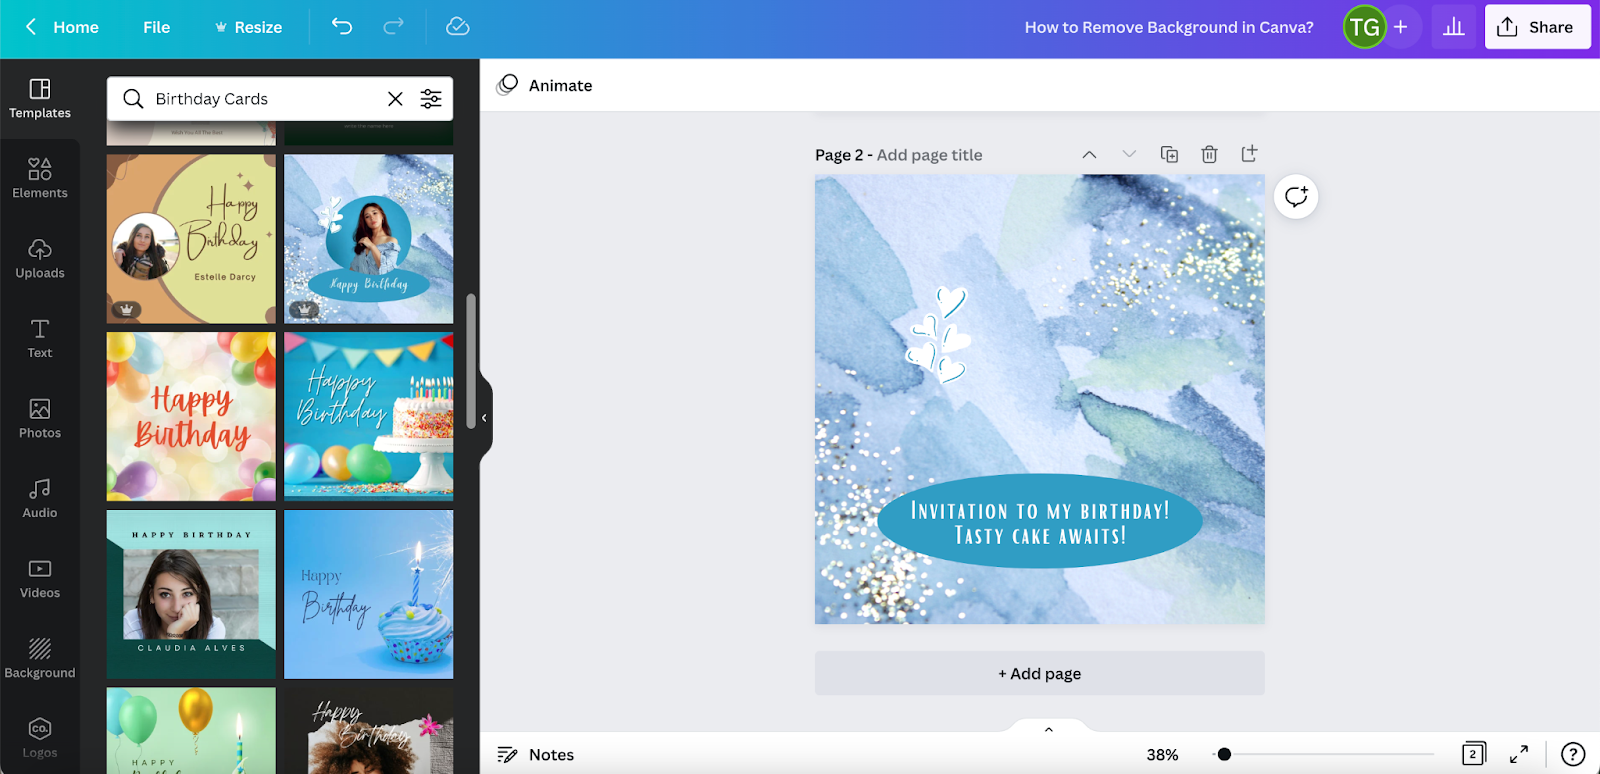
I would like to use the cake in the image with the text. But with the blue background, it’s not really cool. Here you will learn how it can be done without the blue background.
Look at the result below.
Result of combined images
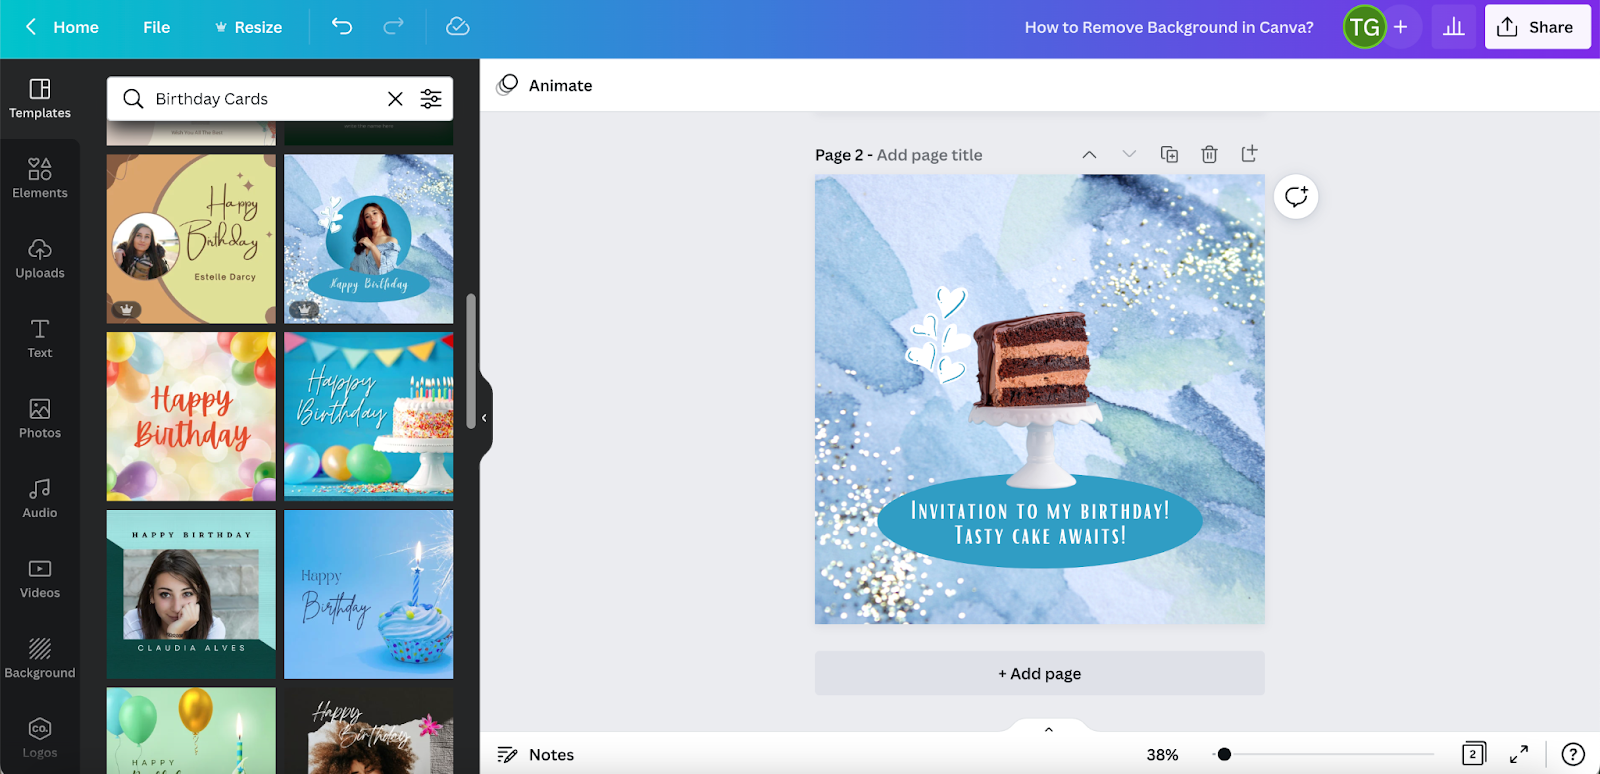
So after removing the background, I can easily integrate the part of the photo that remains into another image, a picture or even a video.
Can you remove the background from all photos?
You need to understand how the background remover works. The tool looks for the most common colour in the photo and tries to remove it. Background with many colours is therefore quite difficult to remove.
Just try it.
What is also tricky is when the object or person you want to isolate from the background has or wears the same colour as the background. However, Canva does a very good job.
So the result is better if the background is one colour and if the object or person has a different colour than the background. Of course, you can do very nice things with the latter.
How to remove the background in Canva
Super easy! A little patience, maybe, because the system needs some time to analyse how your photo is put together, but the waiting is worth it! In the following five steps, you can remove the background from your photo:
- Select the photo and click on the “Edit image” button.

- Click on “Background Remover“. Wait for a moment for Canva to analyse your image.

- After Canva processes this photo, this tool removes the blue background and this delicious slice of cake is left. When done, you are ready to continue editing.
- After you press “Apply“, grab the cake and pull it to the next page where you want to apply the element.
Here is the final result after I’ve merged the two images and downloaded my birthday card.

After removing the background, you can download the cut-out photo like any other design in Canva.
Is your background white or another solid colour in Canva?
Then you can download your photo with a transparent background (Pro feature) so that you can use only the cropped image on a web page or video.
Filters & cool new effects
But there is more than removing the background. Canva has a whole range of options for editing your photos. Using the picture below, I will show you some examples of photo editing in Canva.
You will find these options above your photo/design in Canva. First, I will briefly discuss the classic options, then the almost endless possibilities of the new ‘Effects’.
Canva photo editing features. The ‘Classic‘ options are:
- Filter
- Adjust
- Crop
- Flip

The choice of filters is vast and ranges from all kinds of colour filters to reflect a certain atmosphere to black and white.
Below I have chosen the filter ‘Dare’. You can adjust the intensity of this filter to your liking.
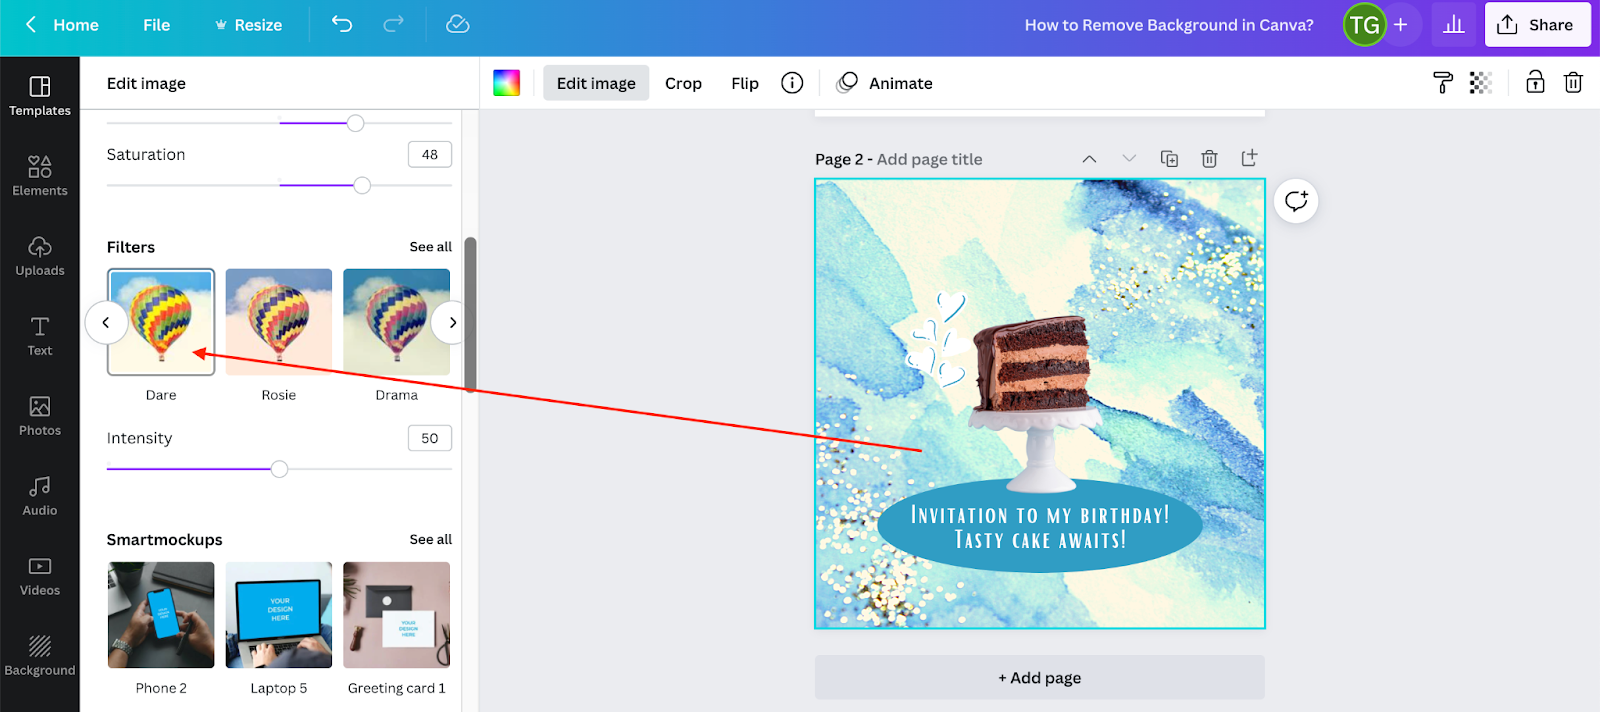
In the top left corner, you can see the filter ‘None‘.

Choose this to go back to your original photo.
Adjust the colours of your image in Canva
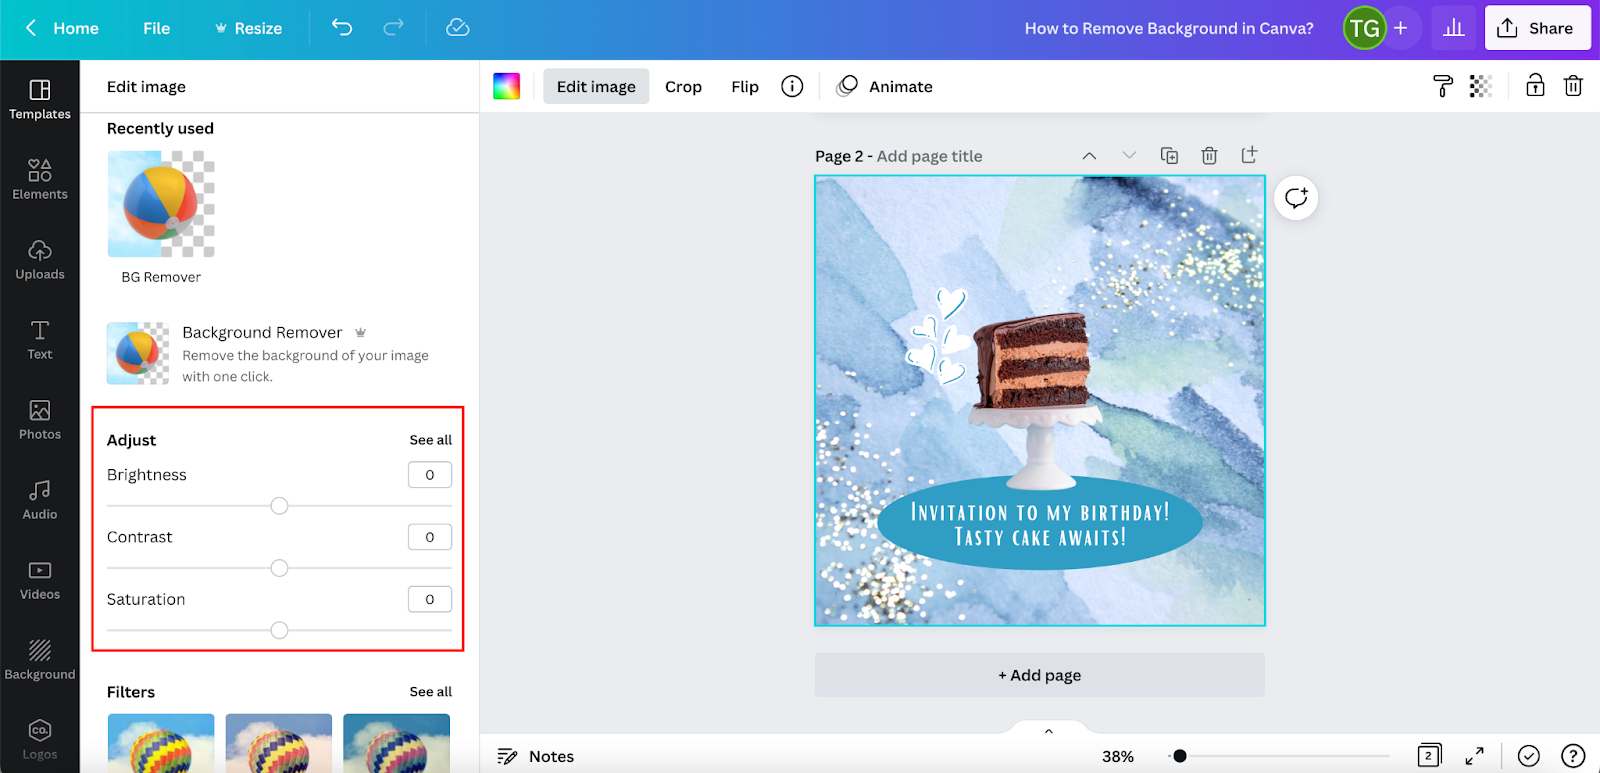
The “Adjust” option allows you to use sliders to precisely adjust all kinds of options, such as brightness, contrast, blur or vignette.
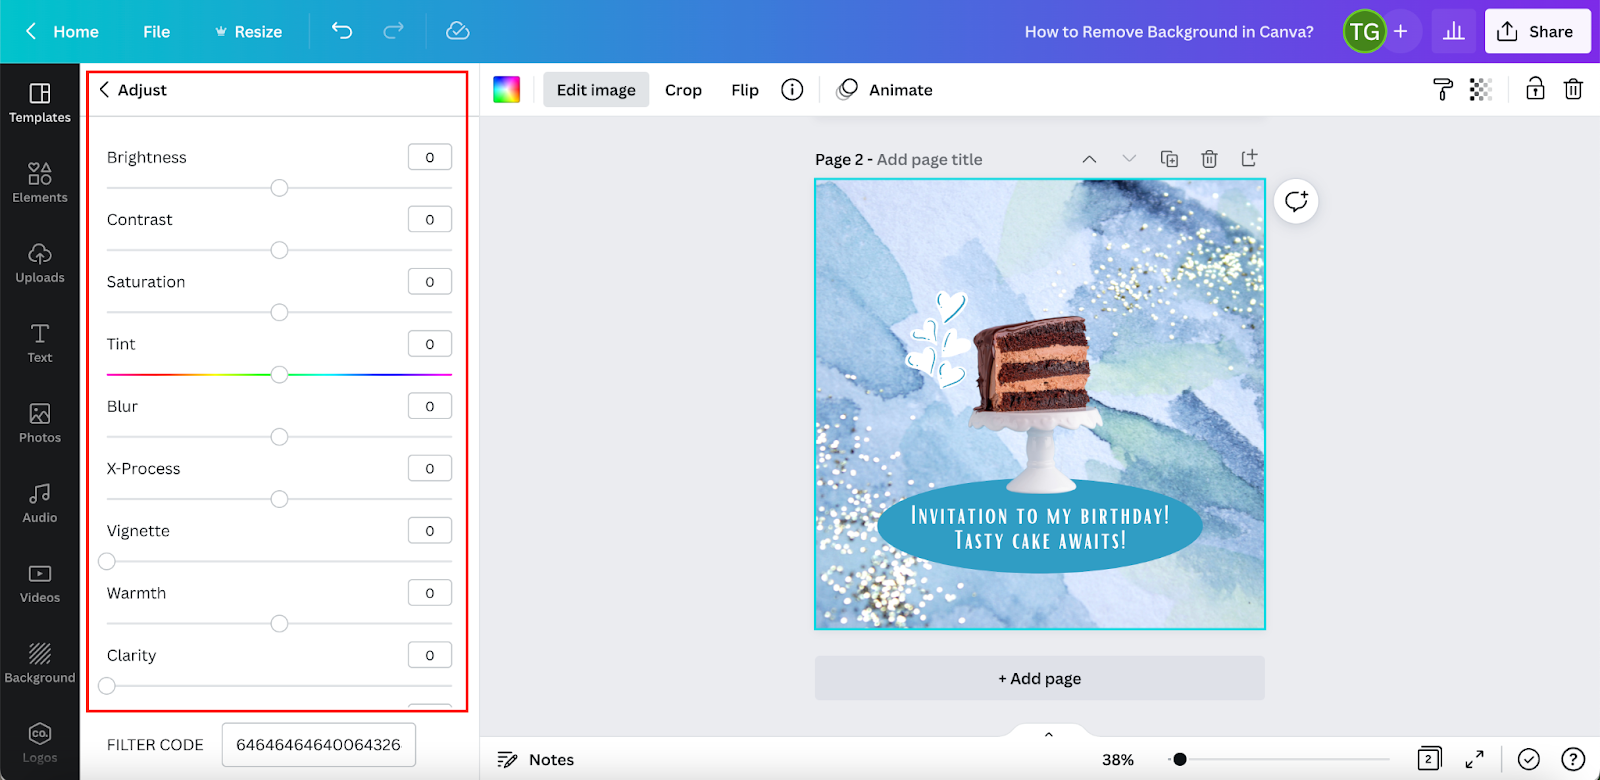
The nice thing about a vignette is that it blurs the edges of the photo so that the middle draws more attention.
Customise your photo in Canva
Crop an image
- Click “Crop” if you want to reduce the size of the photo or remove a border.
- Click on the dashes at the edges to crop a part of the photo. Dragging the dots at the corners will enlarge or reduce the whole photo.

- Click “Done” or “Cancel” to return to design mode.
Note that a background photo cannot be cropped.
Flip an image
Mirroring can be very practical. If an arrow, person or other subject is pointing or looking in the opposite direction to the one you want, mirror your photo.
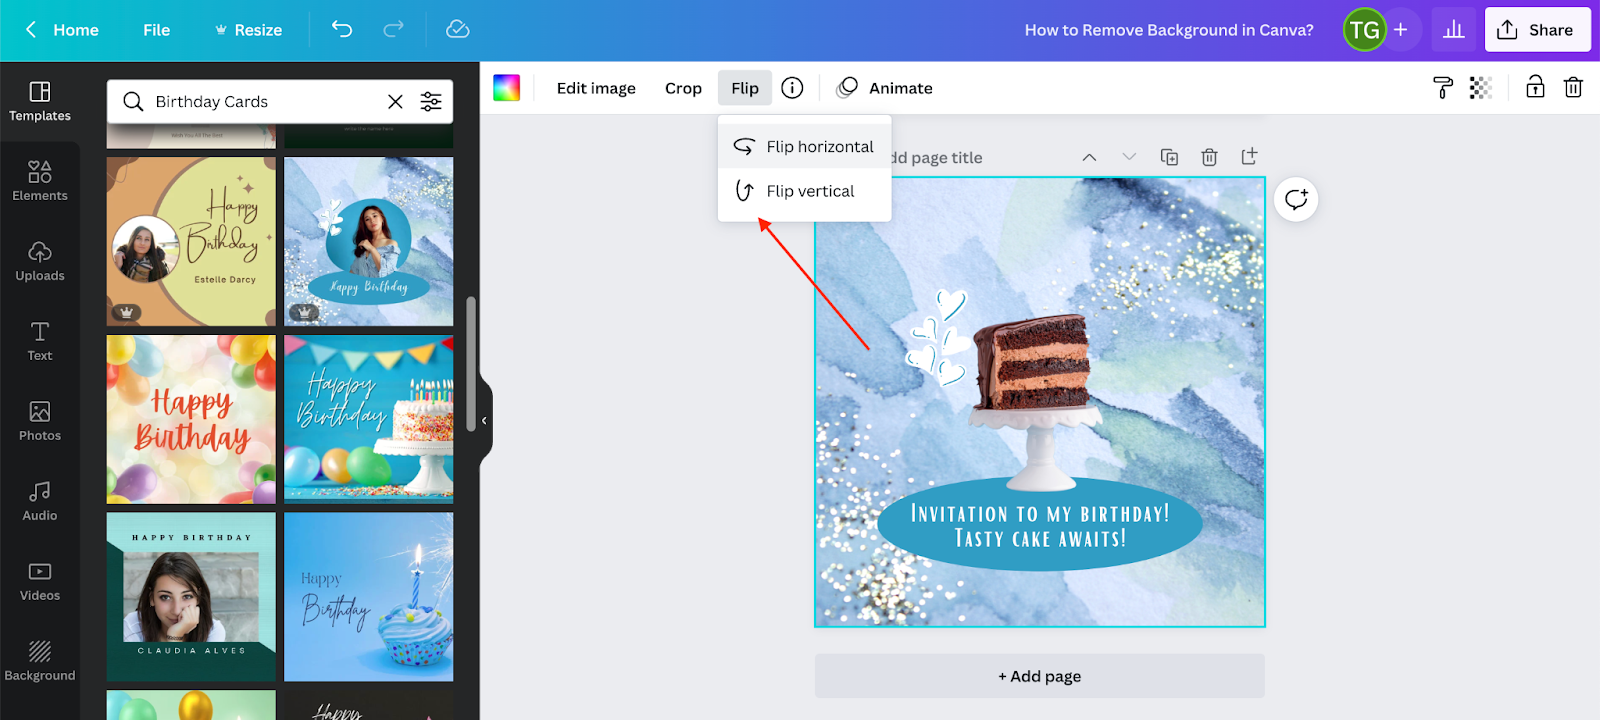
You can do this horizontally or vertically.
Effects in Canva
I still owe you the effects. As said, these are available for the free and the Pro version. The options are very extensive. For each type of effect, you will need to link to the editing options first, but that will take you 2 seconds.
You can find the effects on the left of your screen after clicking the Effects button. Below is the drop-down screen. I have already linked several effects, so it may look slightly different for you.
There is a small preview of all available effects on the photo that is selected in the design.
Overview of Effects in Canva
The effects below have several variations to choose from:
- Photogenic
- Trippy
- Liquify
- Screen
- Split
Here’s one example of the Split Effect in the Trippy section.

Summary
What do you think, is photo editing in Canva difficult? Maybe, more importantly, have you thought of any great applications? In this article, I have given you a quick overview of the possibilities Canva offers for photo editing. Of course, Canva can do much, much more and yours is to discover all its fantastic features in our upcoming tutorials and how-tos.